Papier-mache is one of the oldest forms for creating puppets and so a lot of people think that there must be something better out there. Actually, there are very few contenders. Done well, papier-mache is light, strong, fast, and non-toxic. I know, we’ve all had the experience of the lumpy paste, and corners that stick up and a thing that requires years of sanding to even resemble smooth. It doesn’t have to be that way. I’ll show you a technique that will only need three layers and can be danced on.
Materials
The first thing to do is make sure you’re working with that right stuff.
- Wheat-based wallpaper paste. Why wheat? It has glucose in it, which binds with the cellulose in paper making a much stiffer and stronger wall, so you need fewer layers.
- Brown paper bags & other paper. The important thing here is that you don’t use newspaper. The fibers are short and it has no structural integrity of its on. Mostly it’s used as a counting layer. You do need paper that’s two different colors so you can tell what areas you’ve papier-mache and what you haven’t. I use either leftover printer paper (recycling) or scrap pages out of my sketchpad. As long as it’s not the same color as the bags, a similar weight, and it is uncoated it will work.
- Tissue paper. Yes I do mean Kleenex or toilet paper. We will use this to separate the paper from the form. Regardless of whether you are doing direct papier-mache or working into a mold you don’t want it to stick when it’s dry.
- Plaster mold (optional) If you know how to make a plaster mold it is easier and faster to work into a negative than to papier-mache directly on the form.
Technique
- Mix your wallpaper paste in a shallow container like a pie-plate (anything will work this is easiest). Make a small batch. (Trust me, you will appreciate having to stop and wash your hands to make more.) Cover the bottom of the pan with cool water. Shake a SMALL amount of the paste onto the water. Add more if you need to for the right consistency. I use the Zen method of mixing till it feels right, which for me is like cream of wheat or a melted milkshake.
- Tear the paper into 6″ pieces (approximately). Don’t cut it. You want a soft edge on the paper so it will adhere better and more smoothly to the other pieces. If you’re using heavy paper, like paper bags, put the pieces in a bucket of water to soak. (Printer paper with disintegrate if you do that, so, um, don’t.) This is much like the stage where you soak fabric before dying it. It helps the pores open up and absorb the paste better. It also makes the paper more pliable for going around corner. And finally, it makes the paper swell slightly. As it dries you get a tighter bond with fewer air bubbles.
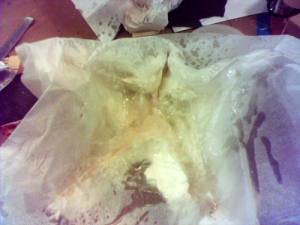 Place the dry tissue paper in the mold (or on your form). After it is covered with a single layer, sprinkle it with water. I’ve splurged on art tissue before and it doesn’t work as well as facial tissue because, well, facial tissue is designed to withstand snot. It holds up better.
- Pick up a piece of brown paper bag and touch the bottom of it to the wallpaper paste so that when you pick it up it’s got maybe two inches covered with paste. (The biggest mistake folks make is to use too much paste). Smear it on both sides of the paper and crumple the piece. We’re trying to break up the fibers in the paper and work the paste into it. All techniques do this it’s just faster to do it with a large piece than lots of small pieces. What you want is for the paste to work inside rather than sitting on the surface.
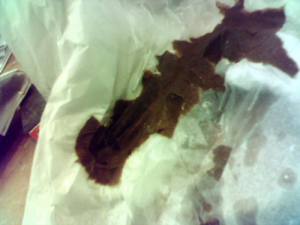 Tear off a piece and place it in the mold or on the form. In a mold this is the layer that will be seen so it’s the only one that has to be neat. (On a form the last layer is the visible one so all layers have to be neat. You’ll just repeat all steps except six). Make sure that the piece is small enough that it doesn’t form wrinkles. Start in the center and work out. Overlap the pieces, pressing to remove airbubbles. When you get to the edge of the mold or form, go outside by at least an inch. You’ll need this to grab hold of when it’s time to take the papier-mache out.
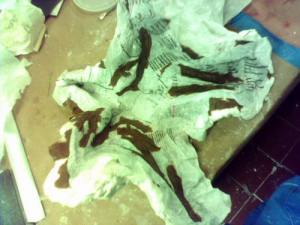 MOLDS ONLY. After the whole layer is covered in brown. Get another piece of the bag, wet it in paste, and crumple it as before. Wad it up and shove it tightly into the detail areas. For instance, if you’ve got a nose, push it as far into the nose and nostrils as you can. What will happen is that the detailed areas will suddenly have ten layers of mache and the surface is smoother so your next layer will go faster.For this photo, I switched to white paper for my second layer and did the wads of paper with the brown so that it was easy for you to see.
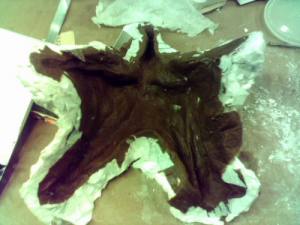 Repeat steps 4-6 with the other paper, when it’s covered go back to the brown bag. Do this until you have between three to five layers. IMPORTANT do it while the layers are wet. They adhere better and you will have fewer airbubbles.
Your final layer will be with whatever your first layer was. I only do three layers. You can see how much smoother the details are on this one than on the first layer.- Let it dry. Put it the sun. Be patient, you can put it in front of a space heater or bake it (250 degrees) but you risk the layers drying at different rates. I have to admit that in the winter I usually force it dry, because I’m not patient.
What works really well, if you can find it, is an old standing hair dryer. It circulates the air and helps the thing dry evenly and pretty darn fast. The biggest challenge. If the top layer dries before the bottom layer — the one touching the plaster — then it will seal the moisture in and slow the bottom layer’s dry time. Make sense? -
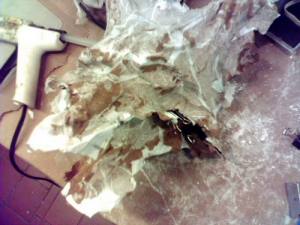 It will reach a stage we call leathery. It’s still flexible, but it’s dry, like leather. This is the best time to pull it out. Be careful, if it’s too early and you see wrinkles happening, don’t do it. It’s better to wait until its completely dry.
 - Peel off what tissue paper you can and the rest smooth down with the paste.
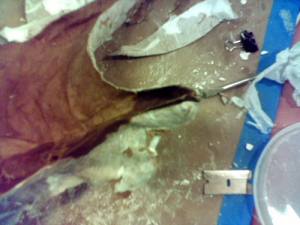 Trim the edges and then wrap them in papier-mache to keep them from peeling up.
You have to take some care with that first layer, but after that the subsequent layers go really, really fast. I can usually crank a single part mold out in forty-five minutes to an hour. It’s a pretty good ratio and the materials are dirt cheap.
I’ve dropped puppets from the second floor, hurled them against walls, and even stood on papier-mached pieces. Done right, the durability is surprising. The detail, going into a mold is pretty crisp, too. As a testament to that, here is the finished face of the wood witch.


Wow,
Thanks for this posting — I’ve been wanting to make a fish ever since I read your posting about (the highly toxic process) of using a hot air gun to weld blue foam. I have just one question: have you tested your creations against the destructive power of three-year-olds with sticks (it’s amazing how quickly they find sticks in the most surprising of places)?
Now all I have to do is convince my partner that filling our living room with a school of electrified light-up fish is a Good Idea. Hmmm, maybe he’ll settle for a fish chandelier ala the exploding crockery one in the MOMA.
PS: Congratulations on your recent “big three” sale.
Oddly, John, I have in fact tested this against three-year olds with sticks. My brother’s wife asked me for advice on papier-mache, so I offered it thinking it was for a school project. I didn’t realize that she was making a pinata. You remember that scene in Parenthood where Steve Martin can’t break the pinata? Yeah. It was that. It was finally my brother and a baseball bat with the pinata on the ground.
Mary, That is a really nicely written article. Thanks so much for taking the time to make it clear, concise and fun.
My pleasure! This technique really did change the way I do puppet building.
This is a fantastic tutorial – thanks! Just one question: do you use some kind of release like petroleum jelly on the plaster mold, or do you just put the first layer of tissue into it completely dry?
Just the tissue paper, which serves as a release. Because it doesn’t have the glue in it, it doesn’t stick to the plaster the way subsequent layers do.
One of the reasons this cures without mildew issues, I think, is that the unsealed plaster wicks moisture from the bottom layer as the moisture in the top layer is evaporating into the air. I’ve gone into non-porous molds and it seems to take significantly longer to reach the leathery stage.
Hi there! This post is a really great resource! Thank you. I have one comment about an alternate release technique. In the past I’ve made clay sculptures that we turn into mache and we used celophane hit with a heat gun as the release instead of tissue paper. You don’t want to melt the celophane, just hit it to tighten the stuff onto the model. Do you know how this compares to using tissue? I haven’t tried the tissue technique for release before.
You know, I haven’t tried the celophane method, though I’ve heard of it. My hunch, and this is just a guess, is that you’ll lose the ability of the plaster mold to wick moisture away. This might make it dry less evenly than a porous release. Still, it’ll be worth giving it a try.
Ah, yes. I think when you use the celophane you let the layers dry before adding the next layer. I wonder how dry time compares. I need to try these back to back!
The thing is that the speed isn’t the only reason to do the wet-on-wet technique. The larger reason is that it’s stronger.
When you let each layer dry what happens is that you wind up with a coat of past on the surface of the paper, so the next layer is adhering to that, more than to the paper below. When you go wet on wet the fibers lock onto the fibers of the layer below so you get a stronger bond and a stronger final product. That’s one of the reasons I can get away with fewer layers with this.
hi, thanks for the tutorial. I like the idea of scrunching the paper to absorb the paste.
I went to a lecture once where I was told about 2 amazing paper mache creations. One was a whole house (in a dry climate somewhere) and the other was a fully operational fob watch with all the workings carved out of paper mache. It is incredible stuff & more should be done with it in this wasteful era…
mmmm… I feel an idea coming on
Wow. I totally want to see the papier mache house.
What about making as papier mache casting from a plaster gauze mold from life. Is the technique the same for a plaster gauze mold?
I’ve used this technique into a plaster gauze mold and it works just fine. You do want to make sure that your plaster gauze mold is thick enough to withstand some force, because you will be pushing against the mold. Make sure it’s three or four layers of gauze.
Thank you for the instructions. The most valuable things that I took away: using tissue to line the mold, using brown paper for strength, and alternating between brown and regular paper making it so easy to see where you’ve been. Thanks to you, the project we made was done in record time, and the result is amazingly strong.
Hi –
This is interesting – when doing freely built up work (not in a mold), I was taught to end with tissue to provide a smooth surface. You are sort of doing the opposite by lining the mold.
I have had a lot of success simply pulping the paper completely using an electric drill with a paint/plaster mixer. I use the pulp like clay for direct modeling. You can control the density of the pulp by wringing it out.
For molds, I either press the pulp directly into the mold, or roll the pulp into a sheet which I lay in the cavity. I then use a spoon and other utensils to press the pulp firmly into the mold, shedding excess water. Making a sheet gives a more uniform wall thickness. You can go as thick or as thin as you like when you roll out the sheet.
The pulping really binds the fibers, and this one-step process produces a very sturdy cast.
I’ve heard of other folks using paper pulp but I haven’t tried it myself. How thick are your layers when you go into a mold?