|
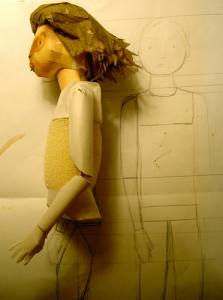
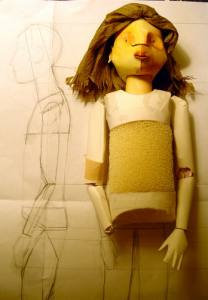
 Once again, I return to the drawing. This is one of the places that I took a shortcut. Were I in a studio, I would have done a top-down view of Coraline in addition to the front and side to make it easier to delegate construction. Once again, I return to the drawing. This is one of the places that I took a shortcut. Were I in a studio, I would have done a top-down view of Coraline in addition to the front and side to make it easier to delegate construction.
Using the front and side view, I get the measurements for the torso at its widest point. I then create a cross-section which will serve as the base of the shoulder piece.
|
|
 From here I have to piece the shoulder together, much the way a dress maker might drape fabric. I started with a simple band to define her chest. From here I have to piece the shoulder together, much the way a dress maker might drape fabric. I started with a simple band to define her chest.
|
|
 I tape and glue pieces together to get the shape that I want. I’ve built these before, so I knew roughly what I needed the individual pieces to look like. I will say though, that the watercolor paper is a heck of a late easier to manipulate than cardboard. I tape and glue pieces together to get the shape that I want. I’ve built these before, so I knew roughly what I needed the individual pieces to look like. I will say though, that the watercolor paper is a heck of a late easier to manipulate than cardboard.
|
|
 Once I had the piece I did a size check to make sure that the neck fit into it appropriately. Once I had the piece I did a size check to make sure that the neck fit into it appropriately.
|
|
 Then I cut apart this thing I’d so laboriously created so that I could make a flat pattern. I spend a lot of time building things and then taking them apart to make patterns. Then I cut apart this thing I’d so laboriously created so that I could make a flat pattern. I spend a lot of time building things and then taking them apart to make patterns.
|
|
 I cut the pattern in half and use that to create the final pattern for symmetricality. We don’t want Coraline to be hunch-backed. I cut the pattern in half and use that to create the final pattern for symmetricality. We don’t want Coraline to be hunch-backed.
|
|
 I double-check to make sure that, yes, the pattern really does work by taping the unit together. And another hearty, whew. It does. I double-check to make sure that, yes, the pattern really does work by taping the unit together. And another hearty, whew. It does.
|
|
 If the shoulders were going to be bare and in view, I would be using paper to seal the joints, the way I did on the face. But, that way is hard, time-consuming and isn’t any stronger than other options. It just gives the cleanest seam. Instead, I’m using Linden tape to tape the thing together. It gets tape inside and out. If the shoulders were going to be bare and in view, I would be using paper to seal the joints, the way I did on the face. But, that way is hard, time-consuming and isn’t any stronger than other options. It just gives the cleanest seam. Instead, I’m using Linden tape to tape the thing together. It gets tape inside and out.
|
|
 Linden tape is normally used for mounting pictures. It’s very fine cloth tape. For my purposes it’s great because it drapes around corners well and is archival quality so I don’t have to worry about her turning yellow and brittle. Linden tape is normally used for mounting pictures. It’s very fine cloth tape. For my purposes it’s great because it drapes around corners well and is archival quality so I don’t have to worry about her turning yellow and brittle.
|
|
 This is a trick I picked up from Marty Robinson, who might have invented it. I use Zap, though any super glue will work, to make the cloth rigid. It’s like mini-fiberglass–superlightweight and stiff. This gives me a really nice seam that won’t flex out of shape. This is a trick I picked up from Marty Robinson, who might have invented it. I use Zap, though any super glue will work, to make the cloth rigid. It’s like mini-fiberglass–superlightweight and stiff. This gives me a really nice seam that won’t flex out of shape.
And yes, before I’m finished, I will have glued my fingers to at least one of the puppets.
|
|
 If you try this at home, please for the love of Pete, use adequate ventilation. Most glues, no matter what they say, have some level of toxicity. This is my crappy drying rack where I’m attempting to push the fumes out of the room. I should be using a ventilator hood, but I don’t have one. When I build the whole set of these, because I’ll be using a lot of glue all at once, assembly-line style, I’ll head down to the Puppet Kitchen. If you try this at home, please for the love of Pete, use adequate ventilation. Most glues, no matter what they say, have some level of toxicity. This is my crappy drying rack where I’m attempting to push the fumes out of the room. I should be using a ventilator hood, but I don’t have one. When I build the whole set of these, because I’ll be using a lot of glue all at once, assembly-line style, I’ll head down to the Puppet Kitchen.
|
|
 I repeat the process on the hips. I didn’t take photos of the hip patterning because it’s a much simpler unit. That and I figure you get the idea. I repeat the process on the hips. I didn’t take photos of the hip patterning because it’s a much simpler unit. That and I figure you get the idea.
|
|
 The hips do differ in one important way. Inside, where I will attach the legs to the torso, I put a small piece of aluminum rod. The legs basically get sewn to the hips and would pull right through the paper. By sending my thread around the rod, it’ll keep that from happening. The hips do differ in one important way. Inside, where I will attach the legs to the torso, I put a small piece of aluminum rod. The legs basically get sewn to the hips and would pull right through the paper. By sending my thread around the rod, it’ll keep that from happening.
|
|
 I threw a piece of linden tap down and zapped it into place. See how it goes transclucent? Neat, huh. I threw a piece of linden tap down and zapped it into place. See how it goes transclucent? Neat, huh.
|
|
 For her abdomen, I’m using a reticulated foam. This is what Muppets are made out of. It’s lightweight, holds its shape and is easier to work with than the upholstery foam that you might buy at a fabric store. For the record? Upholstery foam sucks. Just so you know. For her abdomen, I’m using a reticulated foam. This is what Muppets are made out of. It’s lightweight, holds its shape and is easier to work with than the upholstery foam that you might buy at a fabric store. For the record? Upholstery foam sucks. Just so you know.
The type of reticulated foam I use is called Dri-Fast and it is designed for outdoor furniture. This means that, not only does it let sweat pass through it like rain, it also doesn’t oxidize and crumble as quickly as upholstery foam. The downside to it is that it doesn’t take dye, which is not an issue in this project.
Enough foam digression. I use a turkey carving knife to trim the foam. I love these things. They slice through foam like it’s…turkey.
|
|
 I glued the foam in place using hotglue. Just for kicks, I took a photo of all the glues I’ve used on this project. (I used the 3M 90 to glue the foam to itself to make the tube.) I glued the foam in place using hotglue. Just for kicks, I took a photo of all the glues I’ve used on this project. (I used the 3M 90 to glue the foam to itself to make the tube.)
|
|
 My size check for the side shows that Coraline has a little back fat, so I trimmed that with the carving knife. My size check for the side shows that Coraline has a little back fat, so I trimmed that with the carving knife.
|
|
 And the front checks out just about perfect. Incidentally, you’ll notice that she only have one hand on. I actually just taped that into place as part of the size check. I won’t attach the hands for real until after I clothe her. And the front checks out just about perfect. Incidentally, you’ll notice that she only have one hand on. I actually just taped that into place as part of the size check. I won’t attach the hands for real until after I clothe her.
You know how babies’ hands get stuck in their shirt when you are trying to dress them, because they don’t know how to keep their fingers together? Yeah. Dressing a puppet is a lot like that, but I have the option of taking their hands off and putting them on afterwards.
|
I haven’t been commenting much lately, but I did want to say that I’ve been finding this series fascinating! I appreciate that you’re taking the extra time to photograph and describe the process. Very, very cool!
And I’ll note that there’s a similar problem when dressing action figures, particularly their rigid little thumbs. I use a pair of right-angle tweezers to reach in and unhook tiny sleeves…
Wow, Mary. These sort of construction details are just – beautiful. I can’t think of any other way to say it.
Something tells me you would like this box I have sitting beside my keyboard, so I’ll describe it to you and tell you its story. In fact, I’ll put it in a blog entry, because it’s bound to be long.
Evan: That’s a good trick. I may have to give that a try.
Kristen: Thank you! Coming from a fellow puppeteer, that’s awfully nice praise. I look forward to your box blog post.